
Halloween decorating does not have to mean filling your shopping cart with expensive plastic decorations. A few sheets of black cardstock, old glass jars, leftover fabric, and inexpensive craft supplies can transform an ordinary home into a spooky seasonal display.
The best DIY Halloween decor combines creativity with practical planning. You want decorations that look impressive, fit your budget, match your home’s style, and remain easy to remove and store after October 31.
Whether you are decorating a small apartment, creating a haunted front porch, preparing a Halloween party, or crafting with children, there are plenty of homemade Halloween decorations worth trying.
This guide covers more than 50 ideas, including indoor Halloween decorations, outdoor displays, paper crafts, homemade ghosts, pumpkin projects, budget-friendly decorations, materials, instructions, and important safety tips.
Quick Answer: What Are the Best DIY Halloween Decorations?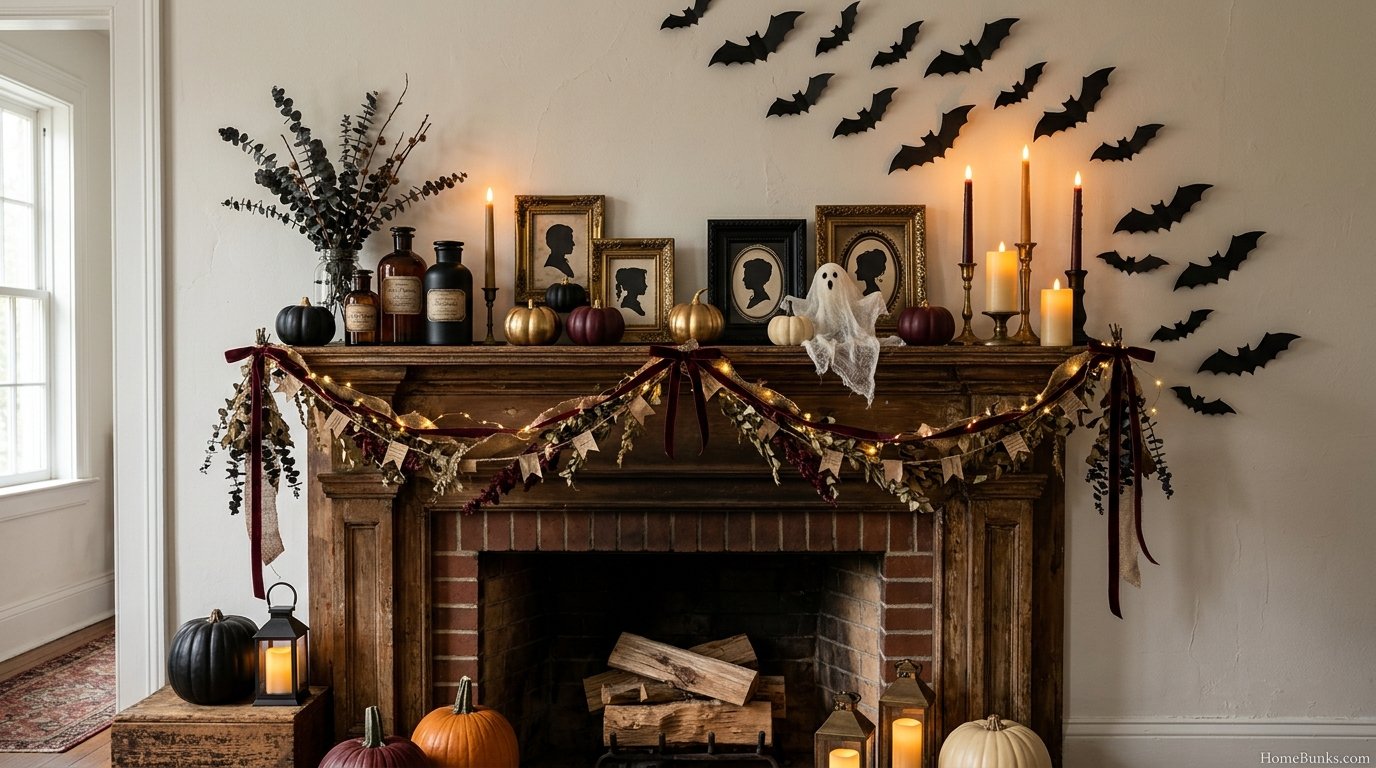
The easiest DIY Halloween decorations include paper bats, cheesecloth ghosts, painted pumpkins, mason jar lanterns, cardboard tombstones, spiderwebs, Halloween wreaths, and homemade potion bottles.
Most beginner projects use inexpensive materials such as cardboard, paper, fabric, glass jars, paint, twine, and battery-operated LED lights.
| DIY decoration | Estimated project time | Estimated DIY cost | Difficulty | Best location |
|---|---|---|---|---|
| Paper bat wall | 20–40 minutes | $1–$5 | Easy | Living room |
| Cheesecloth ghosts | 30–60 minutes plus drying | $5–$12 | Easy | Porch or interior |
| Mummy mason jars | 20–30 minutes | $3–$8 | Easy | Tables and shelves |
| Painted pumpkins | 30–60 minutes | $3–$10 | Easy | Indoor or outdoor |
| Cardboard tombstones | 1–2 hours | $3–$12 | Medium | Yard |
| Halloween wreath | 45–90 minutes | $8–$25 | Medium | Front door |
| Potion bottles | 30–45 minutes | $2–$8 | Easy | Mantel |
| DIY spiderweb | 15–30 minutes | $1–$5 | Easy | Walls or porch |
| Halloween garland | 30–45 minutes | $2–$8 | Easy | Mantel |
| Milk jug ghosts | 30–60 minutes | $2–$8 | Easy | Covered porch |
Costs are planning estimates in US dollars, not verified retailer quotations. Existing household materials can reduce the cost.
1. Easy DIY Halloween Decor Ideas for Beginners
If you are new to crafting, start with projects that require simple materials and minimal tools. You do not need professional equipment to make decorations that look attractive.
1. DIY Paper Bats
Paper bats are among the easiest homemade Halloween decorations. They create a dramatic wall display without requiring expensive supplies.
Materials needed:
- Black cardstock or construction paper
- Pencil
- Scissors
- Removable mounting putty
- Bat template
How to make them:
- Draw a simple bat silhouette on cardstock.
- Fold the paper to create symmetrical wings.
- Cut around the outline.
- Make several bats in different sizes.
- Fold their wings slightly to create a three-dimensional effect.
- Arrange them in a flying pattern across a wall.
Styling tip: Start with a small group near a mirror or doorway. Extend the pattern upward to create the impression of bats flying across the room.
For rented homes, test removable adhesive on an inconspicuous area before decorating.
2. Homemade Cheesecloth Ghosts
Cheesecloth ghosts bring a soft, floating appearance to Halloween displays. They work particularly well on shelves, covered porches, and party tables.
Materials needed:
- White cheesecloth
- A balloon or suitable ghost form
- Fabric stiffener
- A container for shaping
- Black felt or paper for facial features
Instructions:
- Prepare a stable ghost-shaped form.
- Drape cheesecloth over the form.
- Apply fabric stiffener according to its product instructions.
- Arrange the fabric into natural folds.
- Allow it to dry completely.
- Remove the support carefully.
- Attach simple black eyes.
Use an appropriate craft product rather than assuming every glue-and-water mixture will provide the same stiffness.
Expert tip: Use multiple fabric layers to create depth. A slightly uneven bottom edge makes the ghost look more natural.
3. DIY Mummy Mason Jars
Mason jar mummies are useful for Halloween table decorations, shelves, and party displays.
Materials needed:
- Clean glass jars
- White gauze or fabric strips
- Craft glue
- Googly eyes
- Battery-operated LED tea lights
Instructions:
- Clean and dry the jar.
- Wrap gauze around the outside.
- Leave a small opening for the eyes.
- Secure the fabric with craft glue.
- Attach two googly eyes.
- Place a battery-operated light inside.
Avoid placing real candles inside fabric-wrapped jars.
4. DIY Halloween Potion Bottles
Turn ordinary glass bottles into mysterious witchcraft-inspired decorations.
Materials needed:
- Empty glass bottles
- Black, brown, or purple paint
- Paper labels
- Twine
- Craft adhesive
- Decorative faux ingredients
Instructions:
- Wash and dry the bottles.
- Apply paint if you want an aged appearance.
- Design labels with names such as Witch’s Brew, Moon Dust, or Dragon Tears.
- Attach the labels.
- Wrap twine around the bottle neck.
- Arrange the finished bottles in a small group.
Keep decorative bottles clearly separate from food and drinking containers.
5. DIY Halloween Garland
A homemade Halloween garland is an inexpensive way to decorate a mantel, window, doorway, or staircase.
Materials needed:
- Black and orange cardstock
- String or twine
- Scissors
- Hole punch
- Tape or small clips
Instructions:
- Choose a repeating design, such as pumpkins, bats, ghosts, or stars.
- Draw matching shapes on cardstock.
- Cut out the designs.
- Punch small holes or attach clips.
- Thread them onto twine.
- Hang the garland at the desired height.
For a more polished look, alternate three different shapes rather than using one design repeatedly.
6. DIY Toilet Paper Roll Monsters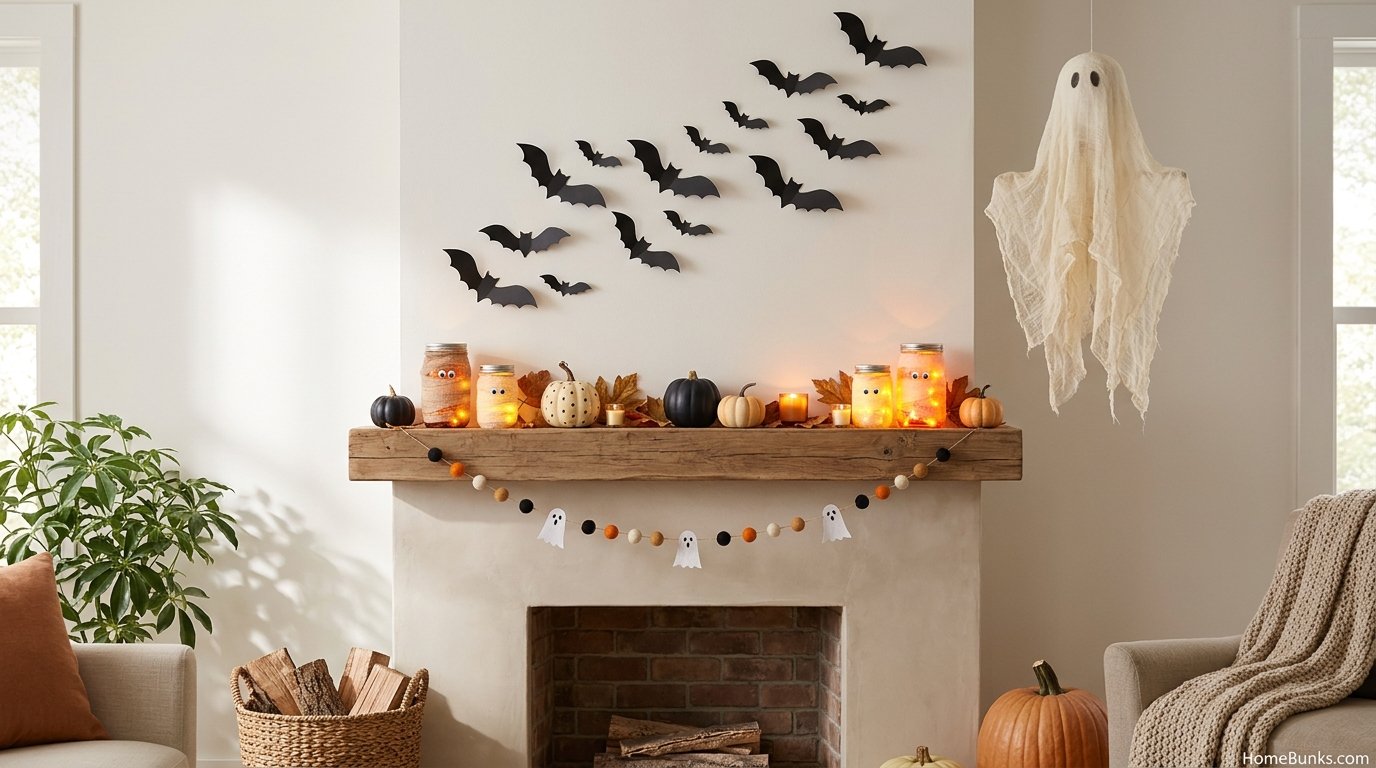
This is a simple recycled Halloween craft for families.
Materials needed:
- Empty toilet paper rolls
- Paint or colored paper
- Googly eyes
- Glue
- Markers
Instructions:
- Cover the cardboard roll with colored paper.
- Add eyes and a mouth.
- Draw teeth, scars, or funny expressions.
- Add paper hair, wings, or horns.
- Display the monsters on a shelf.
Adult supervision is recommended when children use scissors or hot glue.
7. DIY Halloween Window Silhouettes
Window silhouettes create a spooky effect when viewed from outside at night.
Materials needed:
- Black cardstock
- Scissors
- Pencil
- Removable window-safe adhesive
Instructions:
- Draw silhouettes of witches, cats, bats, or haunted houses.
- Cut out each design.
- Arrange them on the inside of the window.
- Check the display from outside.
- Add suitable lighting inside the room.
Choose silhouettes with recognizable shapes so they remain visible from the street.
8. DIY Hanging Witch Hats
Hanging witch hats create height and movement without taking up floor space.
Materials needed:
- Lightweight witch hats
- Clear hanging line
- Suitable ceiling hooks
- Decorative ribbon
Instructions:
- Prepare lightweight hats.
- Attach a secure hanging point.
- Connect the line to the hat.
- Hang at different heights.
- Check clearance around doors and walkways.
Use hooks rated for the surface and weight. Keep decorations away from ceiling fans and lighting fixtures.
9. DIY Halloween Spiderwebs
Artificial spiderwebs can transform an ordinary corner into a haunted display.
Materials needed:
- White yarn or suitable webbing
- Small decorative spiders
- Removable hooks
- Scissors
Instructions:
- Attach several yarn strands to create a central structure.
- Connect the strands with smaller sections.
- Add irregular web patterns.
- Place decorative spiders at different points.
- Keep the display away from walking routes.
Loose, layered webs generally look more convincing than perfectly flat patterns.
10. DIY Halloween Branch Tree
A branch tree is a simple centerpiece for people who prefer natural-looking Halloween decorations.
Materials needed:
- Dry, stable branches
- A suitable vase
- Black paint if desired
- Paper bats or small ornaments
- Decorative stones for the base
Instructions:
- Select clean, structurally sound branches.
- Remove loose bark and debris.
- Paint them if you want a darker appearance.
- Let the finish dry completely.
- Secure the branches in a stable container.
- Hang lightweight Halloween ornaments.
Avoid using unstable branches or placing the arrangement where it could fall onto children or pets.
2. Cheap DIY Halloween Decorations on a Budget
A beautiful Halloween display does not require a large decorating budget. The most economical approach is to reuse materials, choose projects with multiple uses, and decorate a few important areas first.
11. DIY Halloween Decorations Using Household Items
Look around your home before buying supplies.
| Household item | Decoration idea | Additional materials |
|---|---|---|
| Empty glass jars | Mummy lanterns | Gauze and LED lights |
| Old white sheets | Ghost decorations | String and fabric-safe adhesive |
| Cardboard boxes | Tombstones | Paint and markers |
| Empty bottles | Potion bottles | Labels and twine |
| Old picture frames | Haunted artwork | Printed silhouettes |
| Paper bags | Halloween lantern covers | Markers and LED lights |
| Old branches | Spooky tree | Lightweight ornaments |
| Fabric scraps | Mini ghost decorations | Thread |
| Tin cans | Decorative containers | Paint |
| Old books | Vintage Halloween display | Ribbon and paper |
Reuse clean materials whenever practical. However, do not use damaged electrical products or containers that previously held hazardous chemicals.
12. DIY Halloween Decorations Under $10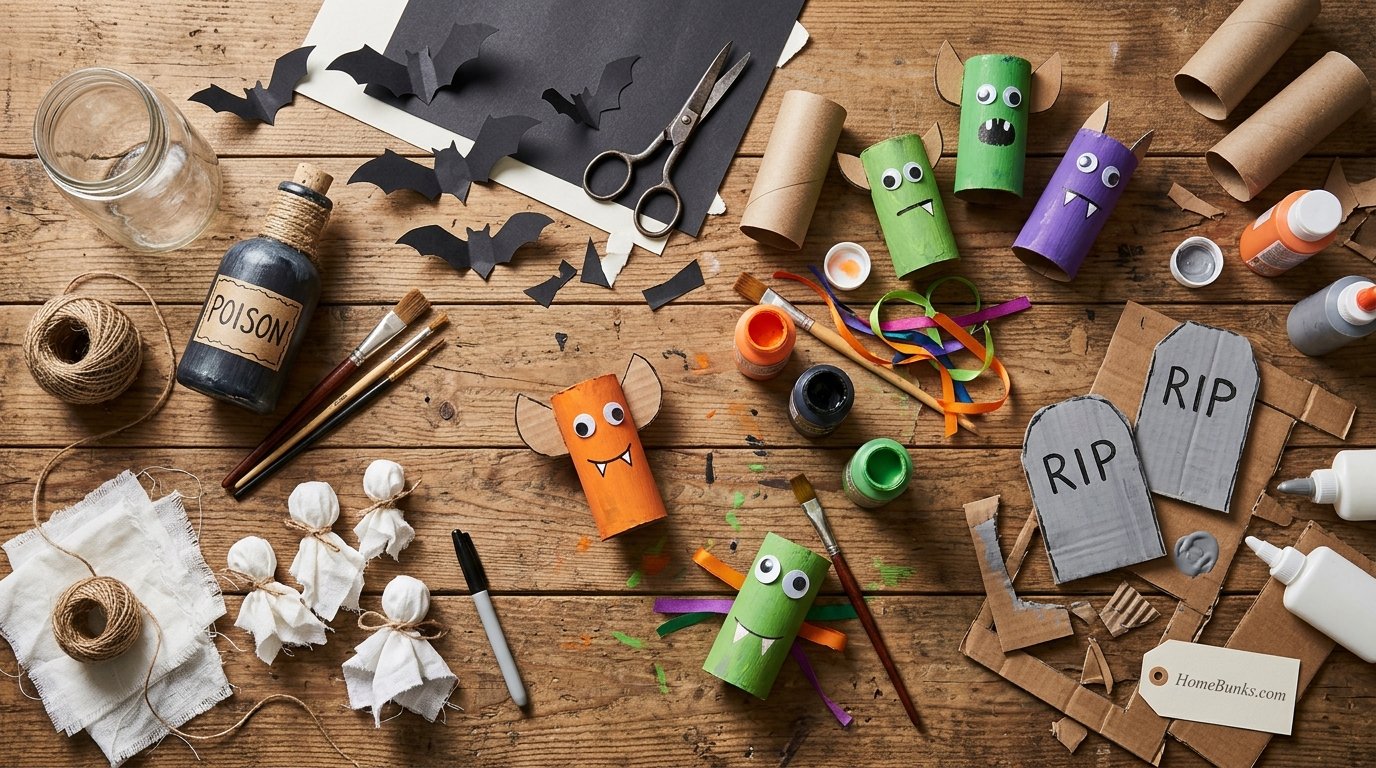
A small budget can still produce an attractive decoration.
Try these projects:
- Black paper bat arrangements.
- Simple cardboard Halloween signs.
- Painted miniature pumpkins.
- Mason jar mummy displays.
- Paper ghost garlands.
- Homemade potion bottle arrangements.
- Small Halloween wreaths using existing bases.
- Window silhouettes.
- Recycled cardboard monsters.
The final price depends on what you already own and the amount of material required.
13. Dollar Store Halloween Decorations
Discount stores can provide affordable craft materials without requiring expensive specialty purchases.
Look for:
- Artificial spiderwebs.
- Foam pumpkins.
- Plastic spiders.
- Black and orange paper.
- Ribbon and twine.
- Battery-operated tea lights.
- Small glass containers.
- Artificial flowers.
- Craft paint.
- Lightweight decorative signs.
A good strategy is to purchase basic materials rather than several unrelated ready-made decorations.
For example, one pack of cardstock can produce bats, pumpkins, window silhouettes, and Halloween garland.
14. DIY Halloween Decorations From Cardboard
Cardboard is one of the most versatile materials for homemade Halloween crafts.
You can create:
- Haunted house silhouettes.
- Graveyard tombstones.
- Monster faces.
- Halloween signs.
- Decorative coffins.
- Oversized spider shapes.
- Haunted window frames.
Basic process:
- Flatten a clean cardboard box.
- Draw your chosen design.
- Cut the shape carefully.
- Apply paint or decorative paper.
- Add details using markers.
- Reinforce freestanding pieces with additional cardboard.
Use indoor or covered locations for ordinary cardboard. It softens when exposed to rain and moisture.
15. Recycled Halloween Decorations
Recycling household materials can reduce waste and lower project costs.
Try using:
- Plastic containers for decorative shapes.
- Old fabric for hanging ghosts.
- Paper packaging for bats.
- Glass jars for potion displays.
- Cardboard tubes for monsters.
- Reusable branches for seasonal arrangements.
Choose materials that can be cleaned and safely reused. Avoid adding unnecessary plastic accessories that make storage difficult.
3. DIY Outdoor Halloween Decorations
Outdoor Halloween decorations need to look good from a distance and withstand the conditions of your location.
The most successful displays combine a clear theme, a focal point, and appropriate lighting.
For a complete outdoor decorating plan, see Outdoor Halloween Decor. You can also explore Halloween Outdoor Decor for additional yard-display and safety ideas.
16. DIY Halloween Front Porch Decorations
Your front porch is one of the most visible areas of your home.
Start with a simple arrangement:
- A handmade wreath.
- A group of pumpkins.
- A Halloween doormat.
- A pair of decorative lanterns.
- A hanging ghost.
- A small seasonal sign.
Styling tip: Use one main color combination, such as black, orange, and cream. Repeat the colors across the doorway and steps.
For more specific styling ideas, visit Halloween Porch Decor.
17. DIY Halloween Graveyard
A homemade graveyard can create a dramatic outdoor Halloween display.
Materials needed:
- Cardboard or suitable outdoor-rated foam board
- Gray and black paint
- Wooden stakes where appropriate
- Paintbrushes
- Weather-resistant fasteners
Instructions:
- Draw several tombstone shapes.
- Cut the pieces from suitable material.
- Paint them in gray and weathered tones.
- Add decorative lettering.
- Secure each piece using appropriate supports.
- Arrange them in a small cluster.
For a display exposed to rain, choose materials designed for outdoor use. Ordinary cardboard is better reserved for dry, covered areas.
18. DIY Outdoor Halloween Ghosts
Hanging ghosts are a classic addition to trees, covered porches, and sheltered outdoor spaces.
Materials needed:
- Lightweight white fabric
- A suitable lightweight form
- Secure hanging line
- Black felt
Instructions:
- Create a stable lightweight head shape.
- Cover it with white fabric.
- Add friendly or spooky facial features.
- Attach a secure hanging point.
- Hang it from an appropriate support.
Use a secure attachment and inspect it after windy weather. Keep the ghost away from electrical wires and walkways.
19. DIY Halloween Pumpkin Stack
A pumpkin stack creates a focal point near your front door.
Materials needed:
- Three or more pumpkins or artificial alternatives
- A stable base
- Decorative ribbon
- Optional paint
Instructions:
- Choose pumpkins in different sizes.
- Place the largest one at the bottom.
- Add smaller pumpkins above it.
- Check stability before adding decorations.
- Repeat your chosen colors through the arrangement.
Artificial pumpkins are useful when you want to reuse the display every year.
20. DIY Halloween Yard Signs
Make custom Halloween signs for your garden or front yard.
Possible messages include:
- Welcome to Our Haunted House.
- Enter If You Dare.
- Beware of Ghosts.
- Trick or Treat.
- Haunted Garden.
Use suitable weather-resistant sign material and secure the sign properly. Keep stakes away from underground utility lines and pedestrian paths.
21. DIY Halloween Spider Decorations
Large decorative spiders can become the main attraction of a porch or garden.
Materials needed:
- Lightweight foam body
- Flexible craft material for legs
- Black paint
- Suitable outdoor attachment
Instructions:
- Prepare a lightweight spider body.
- Shape eight legs.
- Attach the legs securely.
- Paint the structure black.
- Allow it to dry.
- Position it in a sheltered, visible location.
Avoid sharp wire ends and unsecured pieces that could fall during wind.
22. DIY Halloween Walkway Decorations
A decorated walkway makes the approach to your home more inviting.
Try:
- Small pumpkin groupings.
- Low-profile ghost decorations.
- Battery-powered lanterns.
- Weather-rated LED lights.
- Decorative ground signs.
Keep the walking surface clear and ensure visitors can see steps, edges, and changes in elevation.
23. DIY Halloween Balcony Decorations
Apartment balconies can look festive without taking up much space.
Use:
- Lightweight paper bats.
- Small artificial pumpkins.
- Removable window silhouettes.
- Battery-powered lanterns.
- Compact wreaths.
- Rail-safe decorative garlands.
Never hang loose objects over balcony edges. Secure decorations properly and consider neighbors below.
24. DIY Halloween Garage Door Display
A garage door offers a large decorating surface.
Try a giant spiderweb, a haunted house silhouette, or a group of bats.
Use appropriate removable materials and ensure decorations do not interfere with the door’s movement, sensors, or safety mechanisms.
25. DIY Halloween Tree Decorations
Trees provide natural height for outdoor displays.
Hang lightweight ghosts, paper bats, or suitable outdoor ornaments from secure branches.
Avoid heavy decorations that could damage branches. Keep hanging pieces away from overhead power lines and paths.
4. DIY Indoor Halloween Decorations
Indoor Halloween decorations should complement your existing furniture, wall colors, and room layout.
Instead of decorating every available surface, choose two or three focal areas.
For broader room-by-room inspiration, see Halloween Home Decor.
26. DIY Halloween Living Room Decor
Your living room is a good place to create a seasonal focal point.
Try:
- Black and orange cushion covers.
- Paper bat wall arrangements.
- Homemade ghost figures.
- Painted pumpkins.
- Halloween garlands.
- Battery-operated candles.
- Decorative potion bottles.
Choose a consistent palette so the decorations work with your furniture.
27. DIY Halloween Mantel Decorations
A mantel can become the centerpiece of your Halloween interior.
Use a simple arrangement:
- Add a garland as the background.
- Place a taller decorative piece on one side.
- Add pumpkins or lanterns at different heights.
- Include small spiders, bats, or skulls.
- Leave some empty space to avoid clutter.
If you do not have a fireplace, use a console table, bookshelf, or sideboard.
28. DIY Halloween Table Centerpieces
A homemade centerpiece can make an ordinary dining table feel festive.
Ideas:
- Painted pumpkin arrangements.
- Mummy mason jars.
- Mini ghost figures.
- Black and orange floral displays.
- Decorative potion bottles.
- Miniature haunted houses.
Keep the centerpiece low enough for guests to see one another. Avoid unstable objects and open flames around decorative fabrics.
See Halloween Table Decor for more detailed tablescape ideas.
29. DIY Halloween Window Decorations
Windows are useful decorating spaces because they can be viewed from both inside and outside.
Use paper bats, ghost silhouettes, pumpkin shapes, or removable window decals.
For a nighttime display, place suitable lighting inside the room to make the silhouettes visible.
30. DIY Halloween Kitchen Decor
Small changes can make your kitchen feel seasonal without interfering with everyday use.
Try:
- A small pumpkin display.
- Halloween-themed kitchen towels.
- A decorative jar arrangement.
- A seasonal sign.
- A small garland above an appropriate display area.
Keep decorations away from stovetops, hot appliances, food preparation surfaces, and sinks.
31. DIY Halloween Bedroom Decorations
For a quieter Halloween look, choose a few soft decorative elements.
Use:
- Black or orange pillow covers.
- A small ghost decoration.
- Warm LED string lights.
- A seasonal bedside display.
- Paper bats above a dresser.
Avoid excessive lighting and decorations that interfere with sleep or block normal room access.
32. DIY Halloween Bathroom Decorations
A bathroom needs only a few seasonal details.
Try:
- A Halloween hand towel.
- A small decorative pumpkin.
- A themed mirror accent.
- A jar of decorative accessories.
- A small ghost figure.
Keep electrical decorations away from water and damp surfaces. Avoid placing fabric or paper near heating equipment.
33. DIY Halloween Staircase Decorations
Staircases offer a natural vertical display area.
Use lightweight garlands, removable bats, and suitable decorative ribbon.
Keep the handrail accessible. Never place loose decorations on steps or create hanging pieces that obstruct people’s movement.
34. DIY Halloween Apartment Decor
Small apartments benefit from vertical and removable decorations.
Focus on:
- One decorated entryway.
- One living room focal point.
- A small table centerpiece.
- Window silhouettes.
- A compact wall display.
Avoid buying large props that require excessive storage space.
35. DIY Halloween Bookshelf Decor
A bookshelf can become a small Halloween display without requiring major changes.
Group three or four decorative elements:
- Potion bottles.
- Mini pumpkins.
- Small skeleton figures.
- Black paper bats.
- Vintage-style frames.
Use a consistent palette and leave room for the books you actually use.
5. Creative DIY Halloween Crafts and Decorations
These projects are useful when you want something more distinctive than ordinary paper decorations.
36. DIY Halloween Wreath
A homemade wreath makes an attractive front-door focal point.
Materials:
- Grapevine, foam, or wire wreath base
- Black ribbon
- Artificial leaves
- Mini pumpkins
- Decorative spiders
- Floral wire
Instructions:
- Select a suitable wreath base.
- Choose one main decoration.
- Attach larger elements first.
- Add ribbon and smaller decorations.
- Secure heavier pieces with suitable wire.
- Check the finished wreath’s weight and hanging method.
A plain base can be reused with different decorations each year.
For door placement and hanging methods, explore Halloween Door Decor.
37. DIY No-Carve Halloween Pumpkins
No-carve pumpkin decorating is useful when you want a longer-lasting display without cutting into the pumpkin.
Ideas include:
- Painted black pumpkins.
- White pumpkins with dark lettering.
- Metallic painted pumpkins.
- Polka-dot pumpkins.
- Pumpkin faces made with removable accessories.
Clean the pumpkin’s surface before painting. Follow the paint manufacturer’s instructions and allow it to dry completely.
38. DIY Painted Pumpkin Faces
Painted faces are an easy way to create different Halloween personalities.
Materials:
- Pumpkins
- Suitable paint
- Brushes
- Pencil
- Protective work surface
Draw the face before painting. Try friendly ghosts, sleepy faces, witches, monsters, or traditional jack-o’-lantern expressions.
39. DIY Pumpkin Topiary
A pumpkin topiary adds height to an entryway or porch.
Stack pumpkins of different sizes using a stable support. Secure each piece according to its material and weight.
Use artificial pumpkins when you want a reusable display.
40. DIY Floating Halloween Candles
Floating candles create a magical Halloween atmosphere.
Use lightweight battery-operated LED taper candles and a secure hanging method designed for the surface.
Arrange them at different heights, keeping the installation clear of ceiling fans, doorways, and walking routes.
Never suspend heavy objects from unsuitable ceiling fixtures or improvised hooks.
41. DIY Halloween Apothecary Display
An apothecary display uses grouped bottles and jars to create a witch’s laboratory appearance.
Arrange glass containers with:
- Decorative labels.
- Faux dried flowers.
- Colored paper.
- Decorative beads.
- Artificial spiderwebs.
Use clearly labeled decorative materials. Never store real chemicals or hazardous substances in containers that could be mistaken for food or drinks.
42. DIY Halloween Photo Frame
Old picture frames can become spooky decorative artwork.
Remove the original picture if necessary, add a Halloween silhouette, and paint the frame black or another suitable color.
Display several frames together to create a themed gallery wall.
43. DIY Halloween Lanterns
Homemade lanterns work well on shelves, tables, and covered porches.
Use suitable glass or decorative lantern containers with battery-operated lights.
Add a Halloween silhouette or ribbon to the outside. Make sure the material does not interfere with the light or create heat buildup.
44. DIY Halloween Monster Door
Transform an interior door into a friendly monster.
Use removable paper shapes for eyes, teeth, eyebrows, and other features.
This is particularly useful for children’s rooms, classroom doors, and Halloween parties.
45. DIY Halloween Fabric Ghost Garland
Cut lightweight white fabric into small pieces, shape each into a ghost, and attach them to string.
Add small facial details with fabric-safe materials.
This creates a softer alternative to ordinary paper garlands.
46. DIY Halloween Black Cat Silhouettes
Black cat silhouettes are a classic Halloween decorating option.
Cut the shapes from black cardstock and display them on windows, walls, or inside decorative frames.
Vary their sizes and directions to create a more natural arrangement.
47. DIY Halloween Witch Broom
A decorative witch broom can be created using a suitable wooden handle and lightweight natural-looking bristles.
Secure the materials properly and use it as a display prop rather than a functional tool if the construction is decorative.
48. DIY Halloween Haunted House
Create a miniature haunted house from cardboard or foam board.
Add:
- Cutout windows.
- A small doorway.
- Painted roof details.
- Paper ghosts.
- A battery-operated light source.
Make sure the structure is stable and the lighting is suitable for the materials.
49. DIY Halloween Hanging Skeleton
A lightweight decorative skeleton can become a fun focal point.
Choose a suitable manufactured skeleton figure or create a paper skeleton from cutout shapes.
Secure hanging decorations away from doors, ceiling fans, and pedestrian routes.
50. DIY Halloween Candy Display
Create a decorative candy station using jars, trays, labels, and seasonal signs.
Arrange candy by color or type. Keep food in clean, appropriate containers and separate decorative craft materials from anything intended to be eaten.
51. DIY Halloween Party Backdrop
Create a photo area with paper bats, fabric, garlands, and a themed sign.
Use a consistent palette and leave enough room for people to stand comfortably.
Secure the backdrop and keep its supports away from electrical outlets and walking routes.
6. Best DIY Halloween Decor Ideas by Style
Not everyone wants the traditional orange-and-black Halloween look. Your decorations can match the interior design style of your home.
| Style | Main colors | Recommended DIY projects | Best setting |
|---|---|---|---|
| Classic Halloween | Orange, black, cream | Paper bats, pumpkins, ghosts | Family homes |
| Cute Halloween | Pink, cream, lavender | Smiling ghosts, pastel pumpkins | Bedrooms and playrooms |
| Gothic Halloween | Black, burgundy, antique gold | Potion bottles, dark wreaths | Living rooms |
| Vintage Halloween | Aged orange, brown, cream | Retro signs, paper decorations | Traditional homes |
| Minimalist Halloween | Black, white, gray | Simple silhouettes, small pumpkins | Modern apartments |
| Rustic Halloween | Brown, rust, orange | Branch trees, burlap wreaths | Farmhouse interiors |
| Witchcore | Black, purple, green | Apothecary jars, moons, brooms | Shelves and mantels |
If you prefer softer decorations, explore Cute Halloween Decor. For a more complete wall arrangement, see Halloween Wall Decor.
7. DIY vs Store-Bought Halloween Decorations
Should you make your Halloween decorations or purchase them?
The best answer depends on the project, your available time, and how frequently you plan to reuse the item.
| Factor | DIY decorations | Store-bought decorations |
|---|---|---|
| Cost | Often lower for simple crafts | Varies by quality and size |
| Customization | Excellent | Depends on available designs |
| Time | Requires preparation | Usually ready to display |
| Durability | Depends on construction | Varies by product |
| Storage | Depends on materials | Often designed for reuse |
| Skill | Basic to advanced | Usually minimal |
| Uniqueness | Highly customizable | May be widely available |
When DIY Is Better
Make your own decorations when:
- You want to control the colors.
- You already own the materials.
- You enjoy creative projects.
- You want personalized decorations.
- You need simple budget-friendly pieces.
When Buying Is Better
Consider buying when:
- You need a large statement decoration.
- The project requires complex electronics.
- You lack the tools or time.
- You want a professionally manufactured reusable prop.
- Safety or durability depends on specialized construction.
The Best Approach: Combine Both
Buy reusable structural items, such as a wreath base or lantern, and personalize them with homemade accents.
This approach saves time while still giving your home a distinctive appearance.
8. Essential DIY Halloween Craft Supplies
Before starting, organize your materials. Buying everything separately for every project can increase costs.
| Supply | Main use | Helpful tip |
|---|---|---|
| Black cardstock | Bats and silhouettes | Keep extra sheets flat |
| White fabric | Ghost decorations | Choose lightweight material |
| Cheesecloth | Floating ghosts | Allow sufficient drying time |
| Mason jars | Mummy lanterns | Clean before decorating |
| Craft paint | Pumpkins and signs | Match paint to the surface |
| Hot glue gun | Craft assembly | Adult supervision required |
| Scissors | Paper and fabric | Keep sharp tools away from children |
| Twine | Garlands and hanging | Check the weight before hanging |
| Foam board | Outdoor-style props | Protect it from moisture |
| LED tea lights | Decorative lighting | Check batteries and product instructions |
| Removable hooks | Wall displays | Follow surface and weight limits |
| Floral wire | Wreath construction | Fold or cover sharp ends |
Tools Worth Having
A basic DIY Halloween craft kit can include:
- Craft scissors.
- Measuring tape.
- Paintbrushes.
- Pencil and ruler.
- Cutting mat.
- Craft glue.
- Glue gun.
- Protective work surface.
- Small storage containers.
A craft knife should be used by an adult on a suitable cutting surface.
9. How to Make DIY Halloween Decorations Last Longer
A decoration is more valuable when you can use it for several Halloween seasons.
Choose Suitable Materials
Use paper and ordinary cardboard for dry indoor displays.
For outdoor projects, consider materials specifically suitable for outdoor exposure, such as appropriately rated plastics, treated wood, or suitable outdoor foam products.
Protect Decorations From Moisture
Moisture can damage paper, cardboard, fabric, adhesives, and painted finishes.
For exposed displays:
- Check the material’s outdoor suitability.
- Follow the manufacturer’s sealing instructions.
- Secure the decoration against wind.
- Inspect it after rain.
- Bring vulnerable items inside during severe weather.
A clear coating does not automatically make every material waterproof.
Store Decorations Correctly
Use a simple storage system:
- Remove batteries from electronic decorations.
- Clean and completely dry reusable items.
- Fold paper decorations flat.
- Wrap fragile glass pieces.
- Separate indoor and outdoor supplies.
- Label containers by decorating zone.
Photographing your finished display before taking it down can also make next year’s setup easier.
10. Halloween Decorating Safety Tips
DIY Halloween decorating should be creative, but safety must come first.
The National Fire Protection Association reports an annual average of 835 home structure fires beginning with decorations during 2020–2024. Nearly half involved decorations being too close to a heat source.
Source: NFPA Halloween Fire Safety.
Follow these precautions:
Use Battery-Operated Lights
Use battery-operated LED candles or suitable flameless lights inside paper, fabric, and plastic decorations.
The NFPA recommends battery-operated candles or glow sticks for jack-o’-lanterns.
Keep Decorations Away From Heat
Keep fabric, dried flowers, paper, and other combustible decorations away from open flames, heaters, and hot light sources.
Check Electrical Decorations
The U.S. Consumer Product Safety Commission recommends using decorative light strands tested by a recognized testing laboratory.
Inspect old and new lights for damaged wires, cracked sockets, loose connections, or other defects. Discard damaged sets.
Read: CPSC Halloween Safety Tips.
Use Outdoor Electrical Equipment Correctly
Choose lighting and electrical equipment suitable for the intended location.
The NFPA recommends GFCI protection for outdoor electrical decorations and equipment. Follow the manufacturer’s installation instructions and local electrical requirements.
Keep Walkways Clear
Do not place decorations where they obstruct:
- Doorways.
- Steps.
- Emergency exits.
- Sidewalks.
- Driveways.
- Staircases.
Consider Children and Pets
Avoid small detachable parts around young children and decorations that pets could easily swallow.
Keep wires, cords, and fragile objects out of reach.
11. Common DIY Halloween Decorating Mistakes
Even attractive decorations can look messy when the overall arrangement lacks planning.
| Common mistake | Why it causes problems | Better approach |
|---|---|---|
| Mixing too many themes | The display looks disconnected | Choose one main style |
| Using too many colors | Decorations compete visually | Repeat two or three main colors |
| Buying unnecessary supplies | Costs increase | Check household materials first |
| Using indoor paper outside | Rain damages decorations | Choose suitable outdoor materials |
| Overdecorating small rooms | The space feels crowded | Use vertical displays |
| Using real candles near fabric | Increases fire risk | Choose flameless lighting |
| Hanging decorations loosely | Wind can displace them | Use secure suitable attachments |
| Ignoring storage | Decorations become damaged | Organize by zone |
| Blocking walkways | Creates trip hazards | Keep paths clear |
| Making every item a focal point | The display lacks hierarchy | Choose one hero decoration per zone |
12. When Should You Put Up DIY Halloween Decorations?
For most US households, late September to early October is a practical decorating window.
You can start preparing earlier, especially when you plan to make several handmade decorations.
Here is a simple schedule for Halloween 2027.
| Period | What to do |
|---|---|
| July–August | Choose your theme and collect reusable supplies |
| Early September | Make paper decorations and indoor crafts |
| Late September | Decorate the entryway and living room |
| Early October | Complete porch and outdoor displays |
| Mid-October | Inspect lights, anchors, and decorations |
| October 31 | Enjoy your finished Halloween display |
| First week of November | Remove Halloween-specific items and organize storage |
Halloween 2027 falls on Sunday, October 31.
The schedule is a planning recommendation, not a requirement. Your local weather and household activities may change the best time to decorate.
13. Budget-Friendly Halloween Decorating Plans
Instead of buying decorations randomly, choose a plan that fits your available time and spending limit.
These are illustrative DIY planning budgets rather than guaranteed shopping totals.
The Small Budget Plan
Best for: Apartments, renters, and beginners.
Choose:
- Paper bats.
- Window silhouettes.
- One small pumpkin arrangement.
- A homemade garland.
- One decorative jar.
Focus on decorations you can make from materials already at home.
The Medium Budget Plan
Best for: Families and homeowners.
Choose:
- A DIY front-door wreath.
- Cheesecloth ghosts.
- Painted pumpkins.
- Mason jar lanterns.
- A small porch display.
- Indoor table decorations.
Use reusable bases and buy only the materials needed to complete them.
The Full Outdoor Display Plan
Best for: Homeowners who enjoy decorating their yards.
Choose:
- Homemade tombstones.
- A pumpkin grouping.
- Hanging ghosts.
- A decorated entrance.
- Weather-suitable lighting.
- One large focal decoration.
Secure every piece and inspect the walking route after dark.
Key Takeaways: Making Halloween Decor at Home
- Start with easy projects such as paper bats and mummy jars.
- Reuse cardboard, old fabric, glass jars, and other household materials.
- Choose a consistent theme and color palette.
- Decorate the entryway before moving to other areas.
- Use suitable outdoor materials for exposed displays.
- Choose battery-operated lighting around paper and fabric.
- Make decorations reusable through proper construction and storage.
- Keep walkways and emergency exits clear.
- Combine DIY crafts with a few well-chosen store-bought items.
Frequently Asked Questions About DIY Halloween Decor
1. What are the easiest DIY Halloween decorations?
Paper bats, mummy jars, painted pumpkins, paper ghosts, and simple Halloween garlands are among the easiest projects. They use basic craft supplies and require little experience.
2. How can I decorate for Halloween cheaply?
Reuse cardboard, glass jars, old fabric, paper, and branches. Make decorations yourself and focus on a few visible areas rather than decorating every room.
3. What can I use for homemade Halloween decorations?
Common materials include cardstock, cardboard, cheesecloth, fabric, glass jars, paint, twine, foam, ribbon, and artificial decorations.
4. How do you make Halloween decorations at home?
Choose a project, collect its materials, prepare a clean workspace, follow the instructions, and allow paint or adhesive to dry completely before displaying the decoration.
5. What are the best DIY Halloween decorations for beginners?
Paper bats, painted pumpkins, potion bottles, mummy jars, and simple garlands are excellent beginner projects.
6. How do I make a homemade Halloween ghost?
Cover a suitable lightweight ghost-shaped form with cheesecloth, apply fabric stiffener according to its instructions, allow it to dry, and carefully remove the support.
7. How do you make paper bats for Halloween?
Draw a bat silhouette on black cardstock, cut out several shapes, fold the wings slightly, and arrange them across a wall using suitable removable adhesive.
8. How do you make Halloween decorations from cardboard?
Cut cardboard into tombstones, haunted houses, signs, or monster shapes. Paint and decorate the pieces, then reinforce freestanding designs for stability.
9. What are cheap DIY Halloween outdoor decorations?
Cardboard tombstones, painted pumpkins, lightweight ghosts, homemade signs, and suitable porch garlands are inexpensive options. Protect vulnerable materials from rain.
10. How do I decorate my front porch for Halloween?
Start with a wreath, add pumpkins near the entrance, include a suitable lantern or LED display, and finish with a seasonal doormat. Keep the walkway clear.
11. What are good DIY Halloween decorations for apartments?
Paper bats, removable window silhouettes, compact garlands, small pumpkin arrangements, and lightweight door decorations work well in apartments.
12. How can I make Halloween decorations without carving pumpkins?
Paint pumpkins, attach decorative shapes, use removable accessories, or create patterns with suitable craft materials. These methods avoid cutting into the pumpkin.
13. How do you make a Halloween wreath?
Start with a grapevine, foam, or wire base. Add one focal decoration, repeat a few supporting materials, secure everything properly, and choose a suitable hanging method.
14. How do you make Halloween mason jar decorations?
Wrap a clean jar with gauze or fabric, add decorative eyes, and place a battery-operated LED light inside to create a mummy lantern.
15. What Halloween decorations can children make?
Children can help make paper bats, painted pumpkins, cardboard monsters, paper garlands, and simple ghost decorations. Adults should handle sharp tools and hot glue.
16. How can I make my Halloween decorations look expensive?
Choose a limited color palette, repeat materials, use varied heights, group decorations, and leave some empty space. A few well-arranged pieces often look better than many unrelated objects.
17. What are the best DIY Halloween wall decorations?
Paper bat arrangements, ghost silhouettes, handmade banners, Halloween signs, and framed spooky artwork are excellent choices.
18. How do I make outdoor Halloween decorations weather-resistant?
Select materials rated for outdoor use, follow appropriate sealing instructions, secure decorations against wind, and bring vulnerable items inside during severe weather.
19. Are DIY Halloween decorations cheaper than store-bought decorations?
Simple homemade decorations can cost less, especially when you reuse existing materials. However, complicated projects may require more time and supplies than buying a finished product.
20. When should I take down Halloween decorations?
The first week of November is a practical time to remove Halloween-specific decorations. You can keep suitable autumn decorations, such as plain pumpkins and harvest accents, through Thanksgiving.
Conclusion
Creating beautiful DIY Halloween decor is easier when you start with a clear plan and use materials you already have. You do not need an expensive collection of decorations to make your home feel festive.
Start with a few simple projects, such as paper bats, cheesecloth ghosts, painted pumpkins, and mason jar lanterns. Then build your display around your front entrance, living room, and outdoor spaces.
Remember to choose suitable materials, use safe lighting, secure outdoor decorations, and organize everything for storage after Halloween.
The best homemade Halloween decorations are not necessarily the biggest or most expensive. They are the ones that suit your home, fit your budget, and make the season enjoyable.
Explore more seasonal decorating inspiration and practical home styling ideas at HomeBunks.