
Mirrored closet doors are one of those builder-grade features that can feel stuck in 1992. They reflect light beautifully, which is great for small rooms, but the plain, unbroken glass look rarely matches anyone’s actual style. The good news? You do not have to replace them. Overlays let you customize the appearance without removing the mirrors or spending a fortune. Whether you rent, own, or just want a quick weekend upgrade, these ideas work with your existing doors, not against them.
Frosted Film Under an Overlay
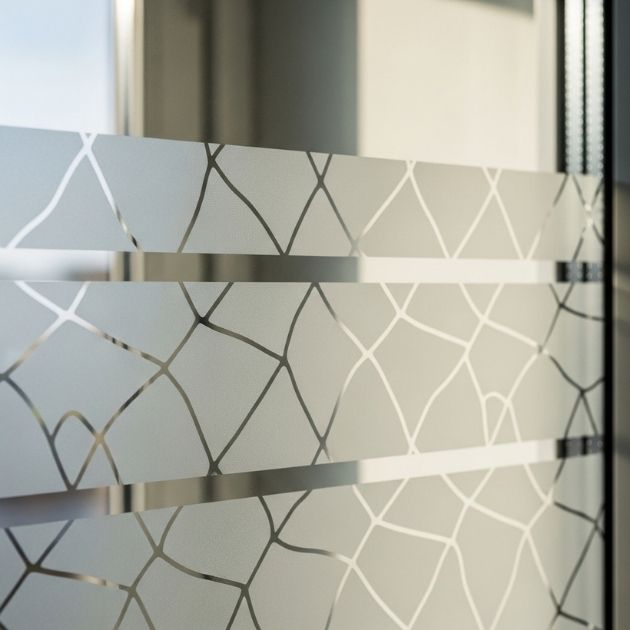
Before you apply any decorative overlay, consider starting with a layer of self-adhesive frosted window film directly on the mirror glass. This one step softens harsh nighttime reflections, reduces glare from bedroom lighting, and creates a matte, spa-like base that makes any overlay on top look more intentional and polished.
The frosted film still allows light to pass through, so your room keeps its bright, open feel. It also adds a subtle privacy layer without completely covering the mirror. From there, you can layer wood trim, geometric tape, or lattice panels right on top.
These products might help:
- Self-adhesive frosted window film (cut-to-size rolls)
- Double-sided heavy-duty mounting tape
- Squeegee application tool for bubble-free installation
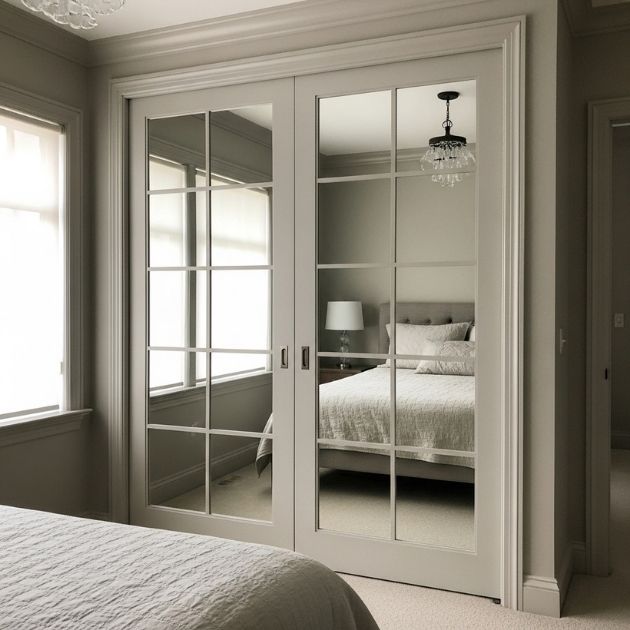
Classic French Door Grid Overlay
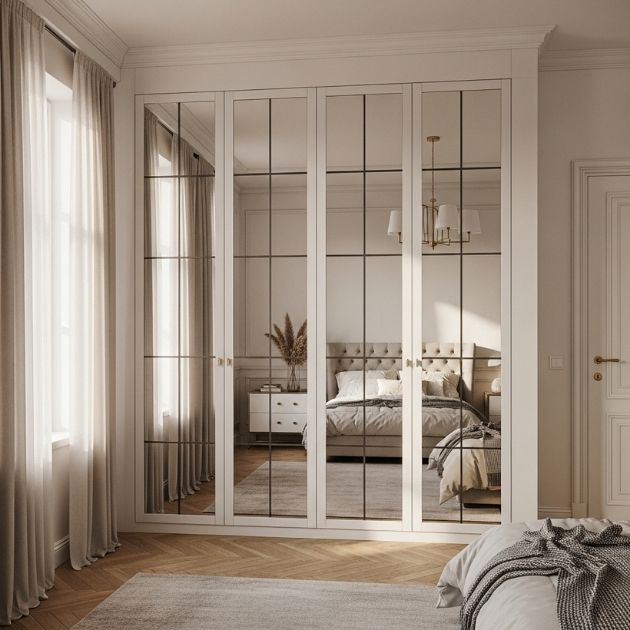
A simple grid overlay is one of the fastest ways to make mirrored closet doors look custom and intentional. By dividing the mirror surface into even rectangular panes, you instantly create the illusion of elegant French-style glass panels. The transformation takes a few hours and costs very little.
Use flexible adhesive trim tape or pre-cut lattice molding strips painted in white or black. Space the grid lines evenly and use a level to keep everything straight. The result reads like architectural detail rather than a DIY project.
Explore these options:
- Self-adhesive decorative trim tape in white or black
- Pre-cut window grid kits with even spacing guides
- Matte finish dummy door knobs to complete the French door look
Slim White Mullion Strips
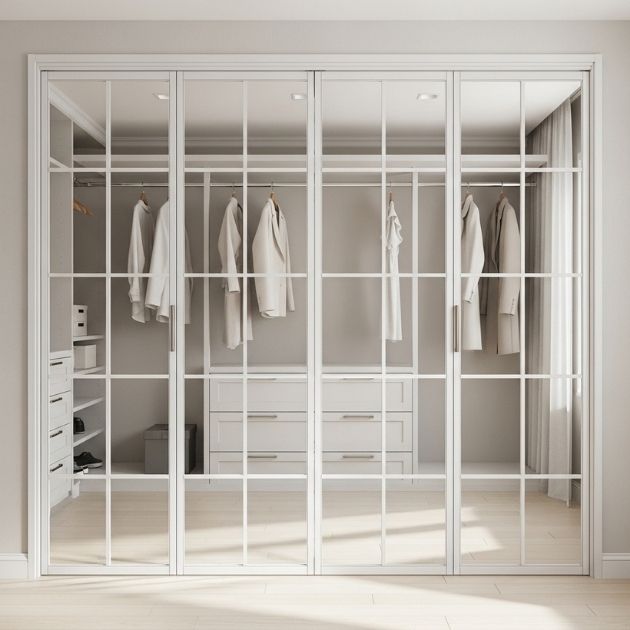
If you love the French grid idea but want something lighter and less structured, slim white mullion strips are your answer. These thin strips create a clean, airy window-pane effect without adding visual bulk. They work especially well in smaller bedrooms where you want the door to add detail without making the space feel cramped.
The key is spacing. Wider panels with fewer strips look more modern, while tighter spacing reads as traditional. Either way, the white finish bounces light around the room and keeps things feeling fresh and open.
Possibly handy products:
- Thin self-adhesive white molding trim
- Decorative window pane tape designed for glass surfaces
- Painter’s tape for layout planning before committing
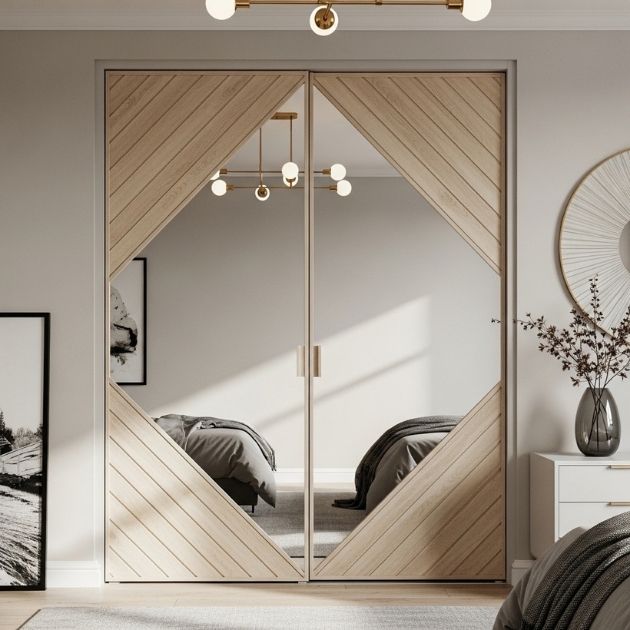
Diamond Pattern Geometric Overlay
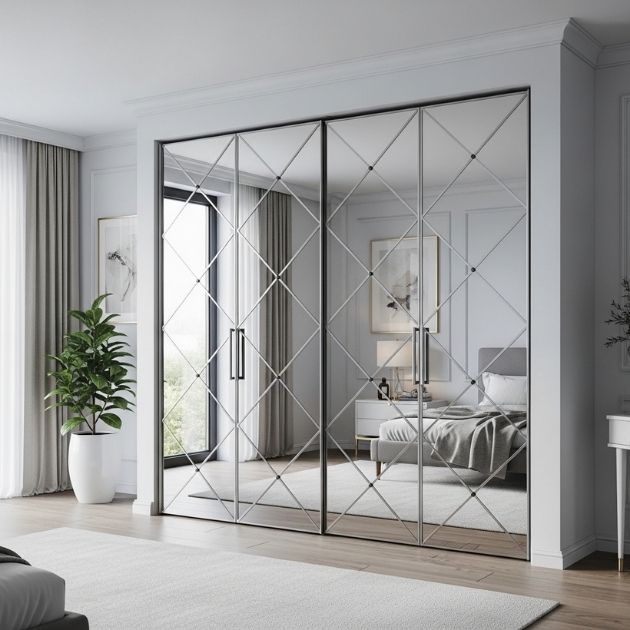
For a more contemporary feel, skip the rectangular grid and go with a diamond or chevron pattern instead. Diagonal lines add movement and energy to a flat mirror surface, and they photograph beautifully for those who care about their room’s visual appeal online or on social media.
Use metallic gold or matte black tape in a repeating diagonal grid. Mark your measurements carefully with a ruler and pencil on a paper template first. The contrast between the reflective glass and an opaque geometric pattern adds real depth and dimension to the wall.
A few helpful options:
- Geometric pattern contact paper in metallic finishes
- Light wood contact paper for a warmer diamond effect
- Decorative window film with grid patterns for a quick no-mess application
Shaker-Style Panel Overlay
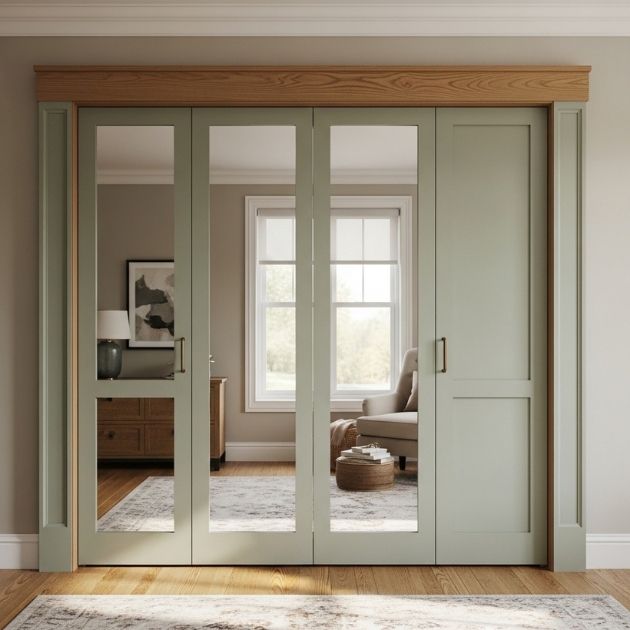
The Shaker style is one of the most timeless looks in interior design, and it translates beautifully to mirrored closet doors. By framing each door with simple rectangular molding strips in a classic panel arrangement, you go from builder-grade to built-in overnight.
Paint the molding strips the same color as your trim or baseboards for a seamless, finished look. This technique works especially well in bedrooms with crown molding or paneled walls, because it ties everything together visually. Construction adhesive holds the strips firmly without damaging the mirror glass underneath.
Try these:
- Self-adhesive molding strips in cut-to-size lengths
- White wood lattice molding with paintable surface
- Paintable wood filler for smooth seams between strips
Painted Overlay to Match Your Trim
One of the most underrated overlay tricks is simply matching your overlay color exactly to your existing room trim. When the frame, molding strips, or grid lines on your closet doors share the same paint color as your baseboards, window frames, and door casings, the whole room feels cohesive and deliberate.
This works in any style from ultra-modern to farmhouse. The mirror behind the trim still reflects light and makes the space feel larger, but the coordinated color palette elevates the entire look. It is a small detail that makes a surprisingly big difference.
Items that may come in handy:
- Peel-and-stick paintable trim molding
- Trim paint in the exact shade of your existing woodwork
- Small foam roller for smooth, drip-free application on molding strips
Matte Black Modern Grid Overlay
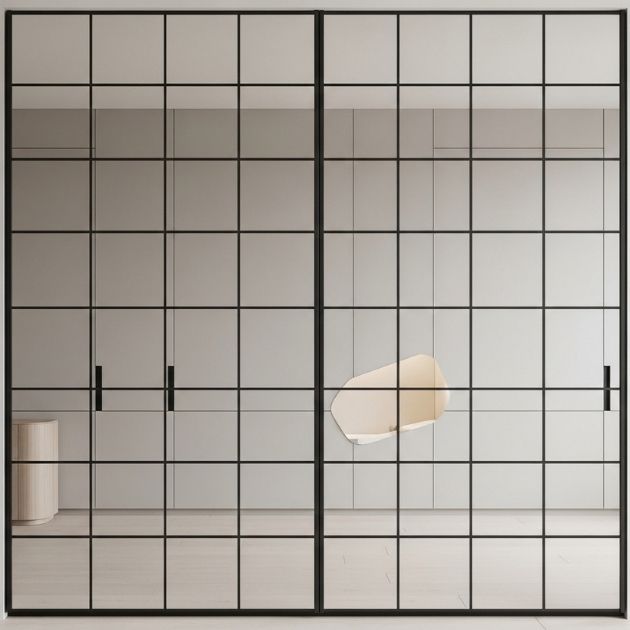
Matte black is having a long moment in interior design, and for good reason. A matte black grid overlay on mirrored closet doors creates a bold, graphic contrast that feels both modern and sophisticated. The opaque black lines against the reflective glass give the surface real visual depth.
This look pairs well with white or light gray walls, natural wood accents, and minimalist bedroom furniture. It also works in industrial or urban loft-style spaces. Use powder-coated metal grilles or simple black adhesive tape, and keep the grid spacing consistent for the cleanest result.
Possibly helpful picks:
- Matte black adhesive window grid tape
- Black powder-coated metal grille panels
- Matte black dummy knobs or pulls to complete the modern look
Picture-Frame Edge Overlay
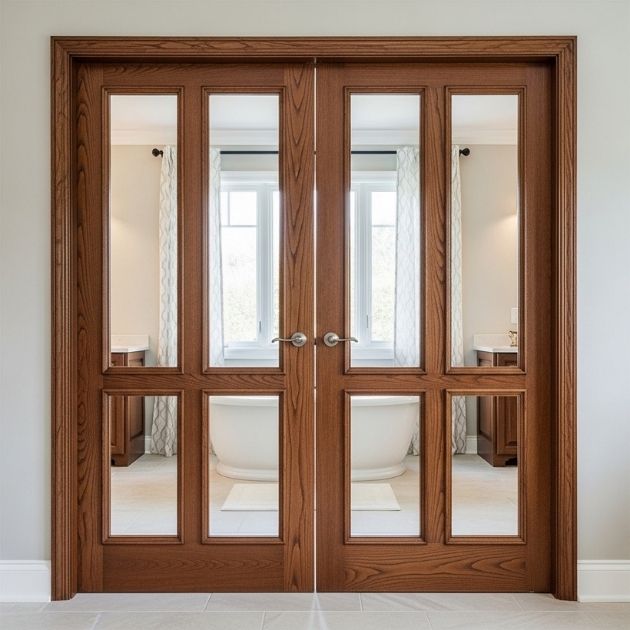
Rather than creating a grid across the entire mirror surface, a picture-frame overlay focuses the detail around the perimeter of each door panel. This creates a clean, gallery-like border that frames the mirror the way a good frame enhances a piece of artwork.
This approach uses less material than a full grid, installs faster, and still adds significant visual interest. Choose a wider frame strip for a bold statement or a slim profile for something understated. Paint the frame to match your trim or leave it in natural wood for warmth.
A few choices to try:
- Wide decorative trim molding for a substantial frame border
- Slim profile adhesive strips for a subtle edge effect
- Corner bracket trim pieces for crisp, professional-looking mitered corners
Arched Window Overlay Illusion
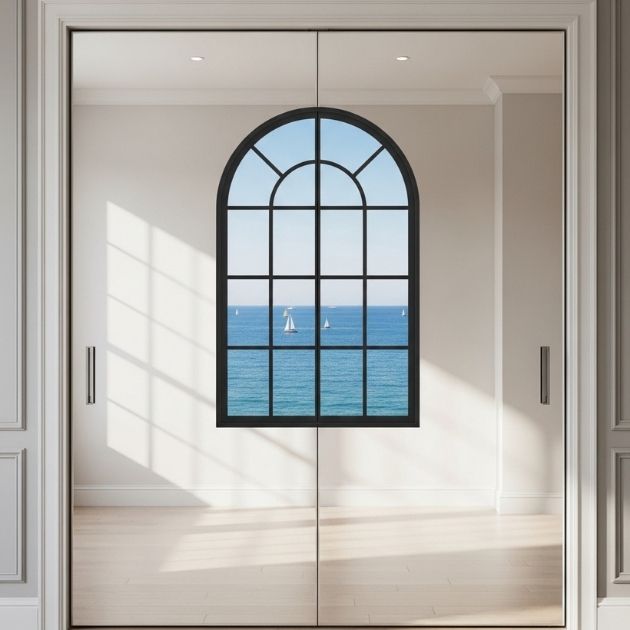
For something truly unexpected, try creating the illusion of an arched window with a curved overlay panel at the top of each door. This works especially well on floor-to-ceiling mirrored doors, where the added height of an arched shape draws the eye upward and makes the ceiling feel taller.
Flexible trim tape bends to create gentle curves. Pair the arch with straight grid lines below for a classic window look, or let it stand alone as a simple decorative arch over an otherwise plain mirror. Either way, it adds architectural interest that looks far more complex than it actually is.
Check if these fit your needs:
- Flexible adhesive trim tape that bends for curved applications
- Pre-cut arch window overlay film kits
- Combination arch-and-grid overlay sets for a full arched window effect
Vertical Wood Slat Overlay Screen
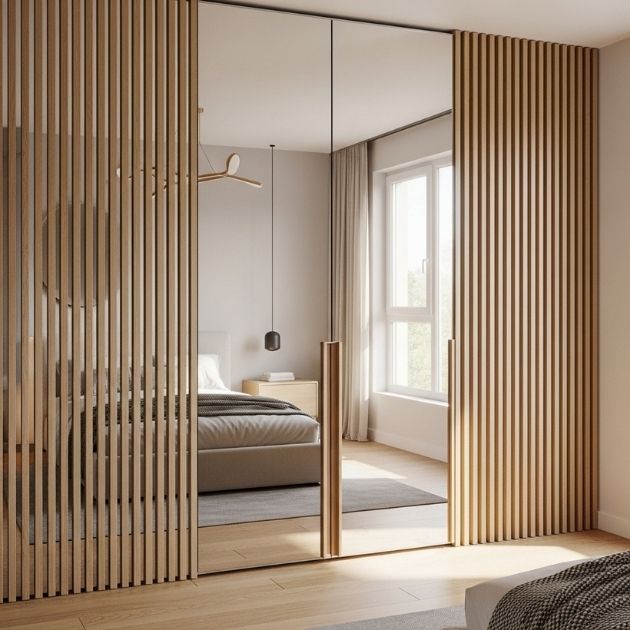
Vertical wood slat panels have become one of the most popular design elements in modern interiors, and they work beautifully as a mirrored closet door overlay. The natural wood texture adds warmth and softness that mirrors alone cannot provide, while the vertical lines make ceilings look higher and rooms feel longer.
Mount lightweight wood slat panels directly over the mirror using strong adhesive strips. Leave a gap between slats if you want the mirror to peek through and keep the light-amplifying effect, or use a tighter spacing for more privacy and a bolder statement.
Products that could assist:
- DIY wood wall slat panels in pre-finished natural tones
- Heavy-duty adhesive mounting strips for glass surfaces
- Matte black recessed finger pulls for a clean modern handle
Herringbone Trim Overlay Pattern
The herringbone pattern brings a layer of visual sophistication that feels both classic and contemporary at the same time. Thin wood strips or adhesive tape arranged in a V-shaped interlocking pattern create texture and movement across the mirror surface without requiring complicated installation.
This overlay works beautifully in bedrooms with parquet floors or herringbone tile in a nearby bathroom, since it creates a cohesive design thread throughout the space. Use natural wood tones for a warm, organic result, or paint the strips white for a crisp, graphic interpretation.
May just do the trick:
- Thin pre-cut wood veneer strips for herringbone layouts
- Adhesive herringbone pattern decal sheets
- Wood stain pen for touching up cut edges on natural wood strips
Woven Rattan-Style Overlay Panels
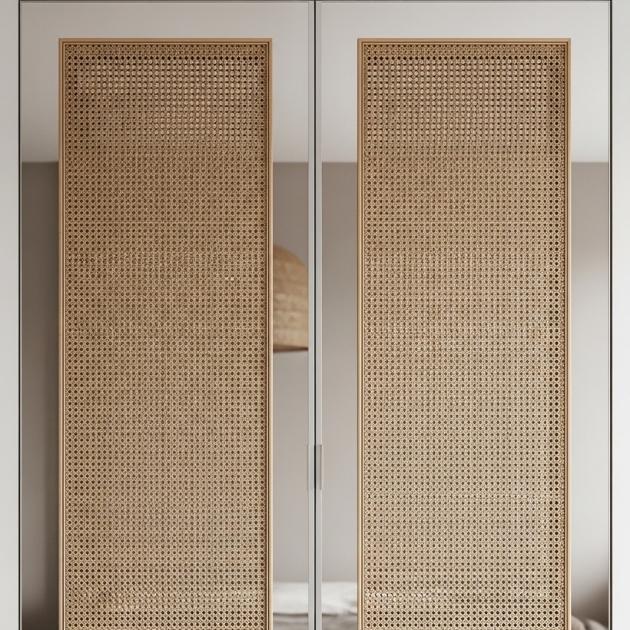
Woven rattan and cane webbing panels are one of the standout natural texture trends in home decor, and they translate perfectly to closet door overlays. The open weave allows the mirror to remain partially visible behind the panel, so you keep some of the light-reflecting benefit while completely transforming the door’s appearance.
Frame each rattan panel with slim wood trim molding to give it a finished, furniture-like look. This works especially well in bohemian, coastal, or Japandi-inspired bedrooms where natural materials and organic textures are central to the style.
A few suggestions:
- Natural rattan cane webbing rolls in standard widths
- Unfinished pine wood trim molding for framing the panels
- Heavy-duty staple gun kit for securing the webbing to a backing frame
Fabric Overlay Panels You Can Remove
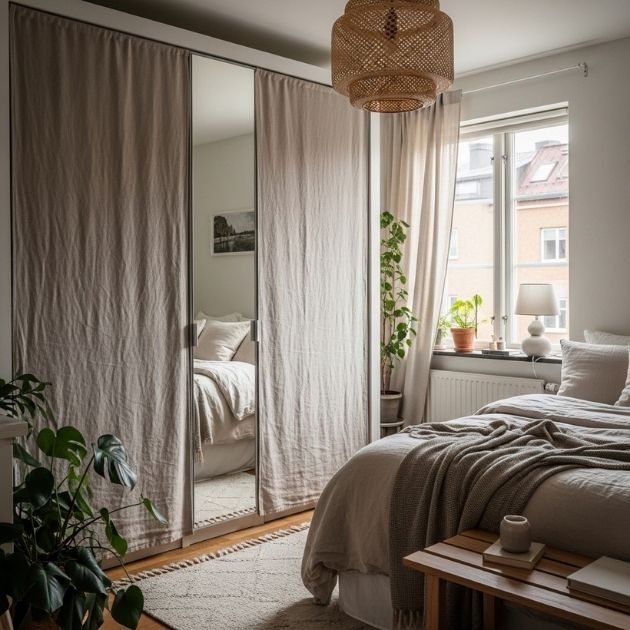
For renters or anyone who wants maximum flexibility, removable fabric overlay panels are the most practical option on this list. Hang lightweight fabric panels from a tension rod mounted inside the door track, or use removable adhesive hooks to position sheer or opaque panels directly over the mirror.
Sheer fabrics keep the room feeling light and airy while softening the stark reflective surface. Printed fabrics add color and pattern. Best of all, you can swap them out seasonally or take them with you when you move.
Consider these options:
- Lightweight sheer fabric panels with rod pocket headers
- Fabric adhesive spray for a smooth, wrinkle-free finish
- Removable adhesive hooks rated for smooth glass surfaces
Wallpaper Insets With Trim Overlay Frames
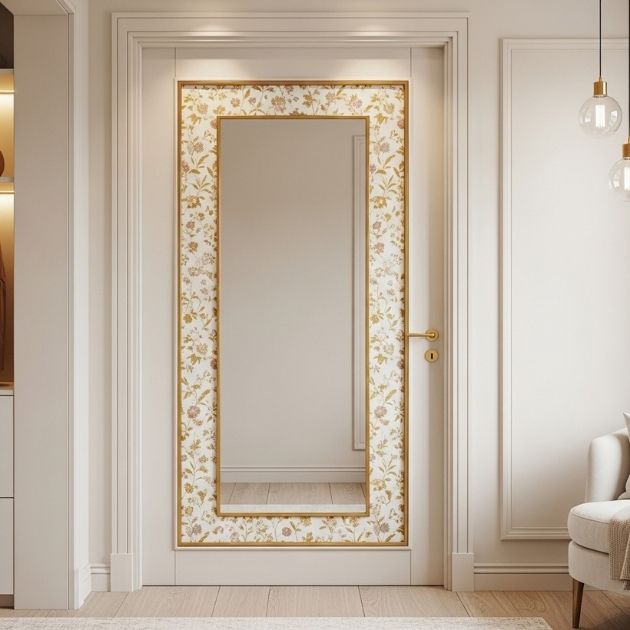
This idea combines two popular DIY techniques into one high-impact result. First, apply peel-and-stick wallpaper panels to sections of the mirror glass. Then frame each wallpaper inset with adhesive trim strips to create the look of framed wall panels. The finished result resembles custom built-in millwork.
Choose wallpaper with subtle texture, grasscloth effect, or a geometric print. The reflective mirror beneath slightly alters how the wallpaper looks, creating a depth effect you cannot achieve on a flat wall. This is a great way to introduce pattern into a room without wallpapering an entire wall.
Maybe worth checking out:
- Peel-and-stick grasscloth or textured wallpaper panels
- Self-adhesive trim strips for framing each wallpaper inset
- Precision cutting mat and craft knife for clean, straight edges
Magnetic Planner Overlay Sections
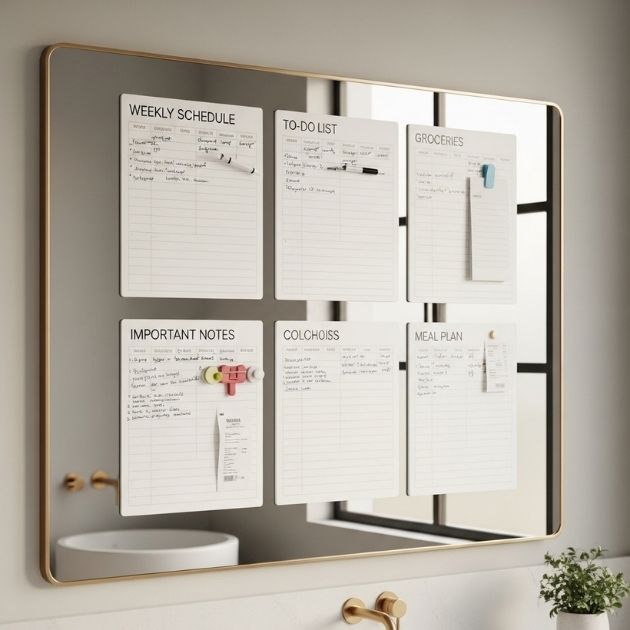
Here is an idea that serves both style and function. Apply a magnetic primer or adhesive magnetic sheet to a section of your mirrored closet doors, then create a grid overlay around it using trim strips. The result is a framed magnetic planning board built right into your closet door.
Use this section for a weekly planner, grocery list, or mood board with removable magnetic clips and markers. The rest of the door remains a functional mirror. This approach is especially useful in small apartments where wall space is limited and every surface needs to work harder.
You might give these a try:
- Adhesive magnetic sheets sized for standard door panels
- Dry-erase magnetic markers and eraser sets
- Slim trim overlay strips to frame the magnetic planning section
Stained-Glass Film With “Lead” Overlay Lines
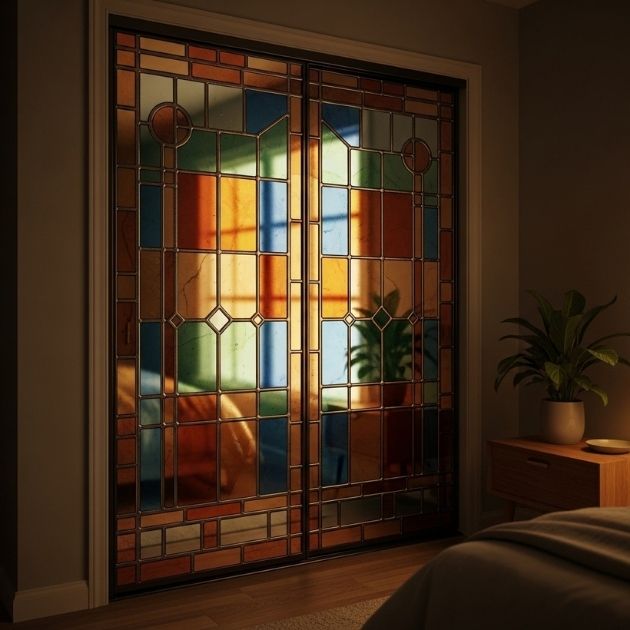
For a truly dramatic makeover, combine colored decorative window film with thin black self-adhesive strips that mimic the look of traditional leaded glass. The film adds color and filters light in beautiful ways, while the black overlay lines create the impression of genuine stained glass panels.
This approach works in eclectic, Victorian, or maximalist interiors where bold choices are celebrated. Choose jewel tones like sapphire, emerald, or amber for a rich, vibrant effect, or opt for softer pastels for a more understated stained-glass look.
Might be a good match:
- Colored decorative window film in jewel or pastel tones
- Self-adhesive black leading strips for authentic stained-glass lines
- Corner leading strips for clean intersections and joints
Shadow-Casting Cutout Overlay Panels
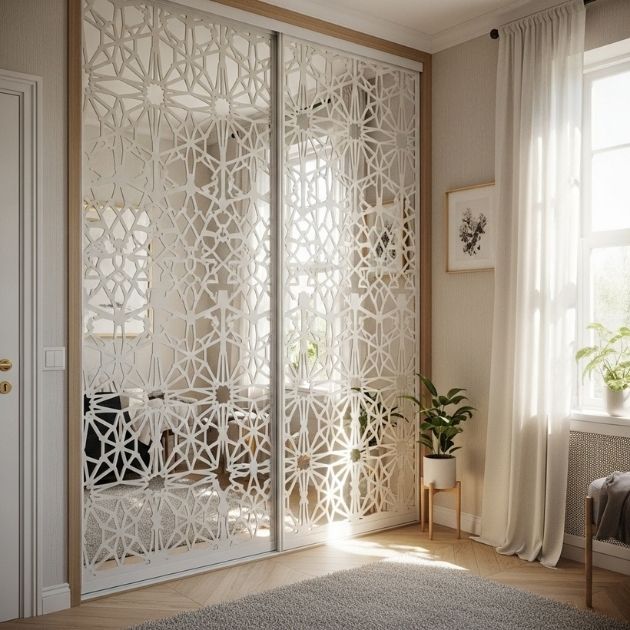
Decorative fretwork or laser-cut overlay panels are the most artistic option on this list. These lightweight panels, typically made from MDF or PVC, feature intricate cutout patterns that cast beautiful shadows across the room when light hits the mirror behind them. The effect changes throughout the day as natural light moves.
Choose geometric fretwork for a modern look or floral and lattice patterns for something more ornate. Attach the panels with heavy-duty clear mounting tape or mirror adhesive, and consider painting them to match your wall color for a seamless, almost architectural result.
You might like:
- Lightweight decorative fretwork panels in paintable MDF
- Adhesive tape for securing panels directly to glass
- Paintable fretwork panels for a fully customized color match
Final Thoughts
Mirrored closet doors do not have to be a design compromise. With the right overlay approach, they become a genuine focal point, a space-expanding feature, and a reflection of your personal style all at once. Whether you choose a simple matte black grid, a cozy Shaker frame, or a bold stained-glass film treatment, the key is committing to a look that feels intentional and coordinated with the rest of your room.
Start with frosted film if glare is an issue, map out your overlay with painter’s tape before cutting anything, and always use materials rated for glass surfaces. Most of these projects take a weekend or less and cost a fraction of what full door replacement would run.
The mirror is already doing the heavy lifting by making your space feel bigger and brighter. Your overlay just needs to make it look like it belongs there.